How to Create a Parent Account in Salesforce (Step-By-Step Guide)

In life, one doesn’t become a parent until one has children. The same is true in Salesforce. An account becomes a parent account when it is associated with child accounts (also known as sub accounts). The parent/child account label is simply a hierarchical way to organize associated accounts in Salesforce.

A parent account in Salesforce simplifies daily work by creating associations, facilitating built-in functionality and providing quick access to Salesforce reports.
So, how does one create a parent account in Salesforce?
What is meant by a parent account in Salesforce?
A parent account in Salesforce is basically the summation of their respective child accounts. In other words, any account loaded with information from various sources into a single account based on a set of rules is referred to as a “parent account.”
For example, imagine you have a large company with several smaller subsidiaries, each with its own associated account. To understand the relationships between information stored in each of these accounts, you will need a mechanism to identify related subsidiary accounts and create a relationship with the large company based on certain criteria.
These subsidiary accounts can be either branch accounts or partners’ accounts. Using the parent account setting feature, we can easily create, trace, and locate data among these accounts.
How to create a parent account in Salesforce
In this section, we will provide a detailed breakdown of each step required in creating a parent account.
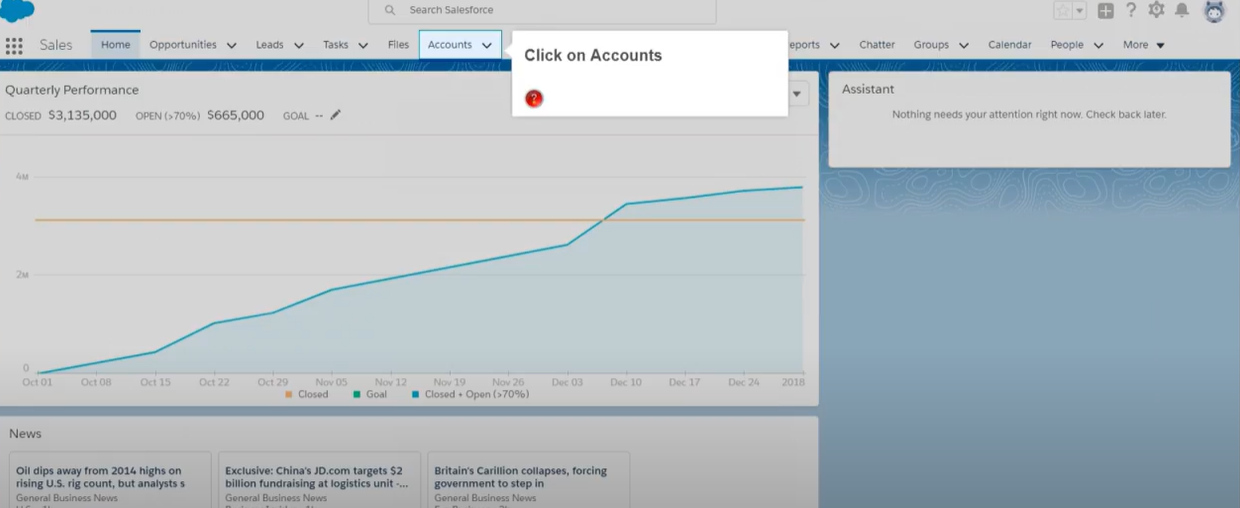
1. Upon opening your Salesforce Homepage, click on Accounts. You will find it in the top right corner of the menu bar.
2. Select an Account or create a new one, as demonstrated in the image below.

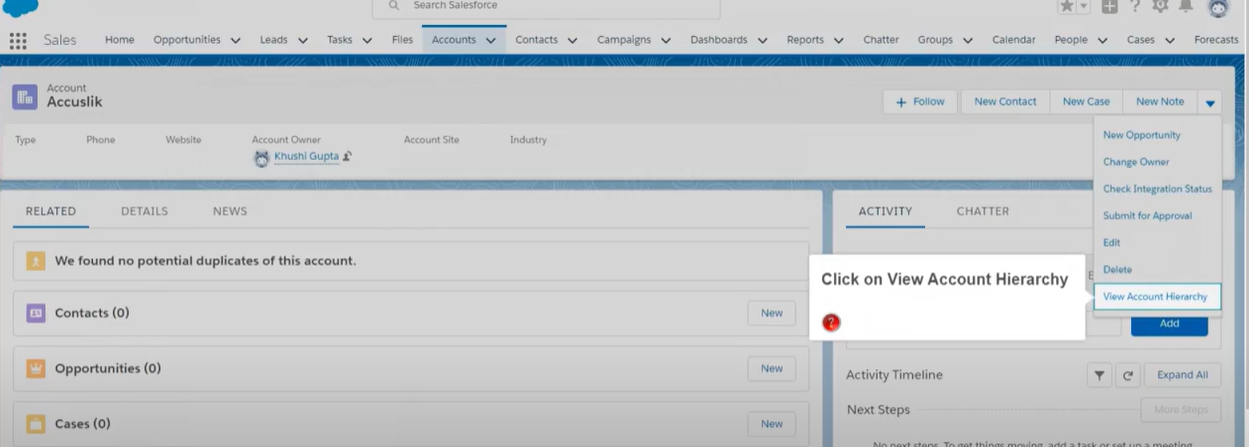
3. Click the down arrow button to reveal actions that you will need for the further processing purposes.

4. Click on the View Account Hierarchy.
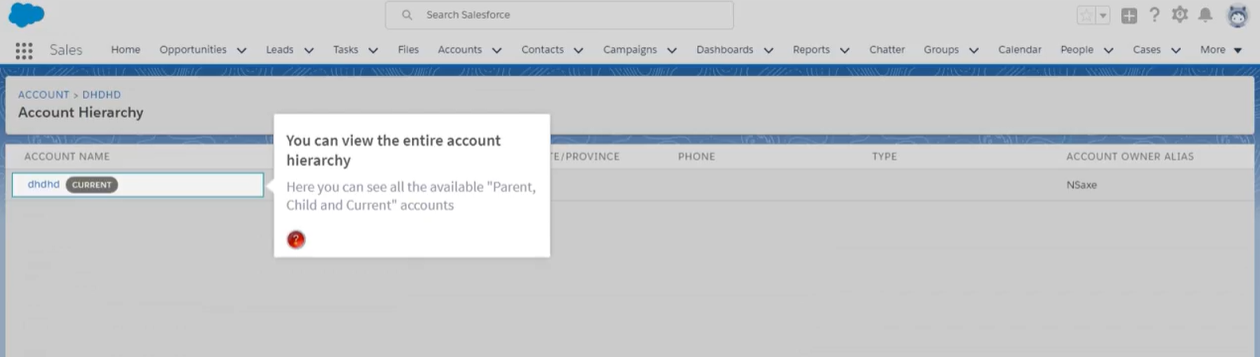
5. You can now view the entire account hierarchy, consisting of all the available “Parent, Child, and Current” accounts.
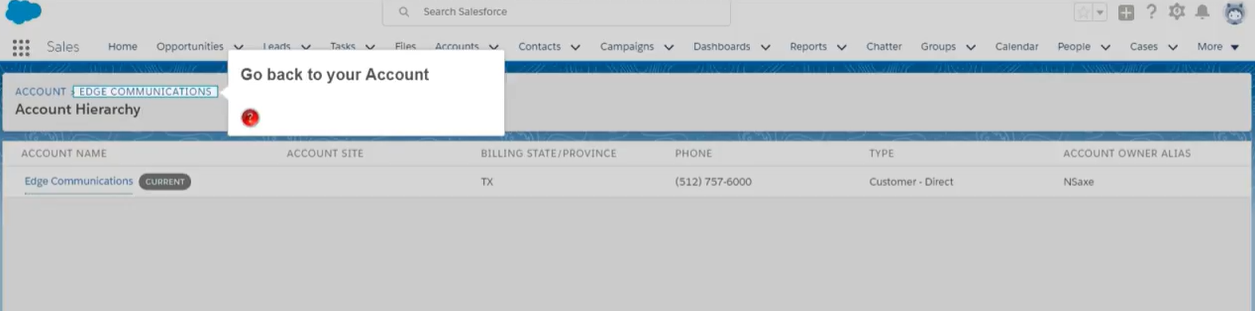
6. Once you are done viewing the account hierarchy, go back to your account for the next step ahead.
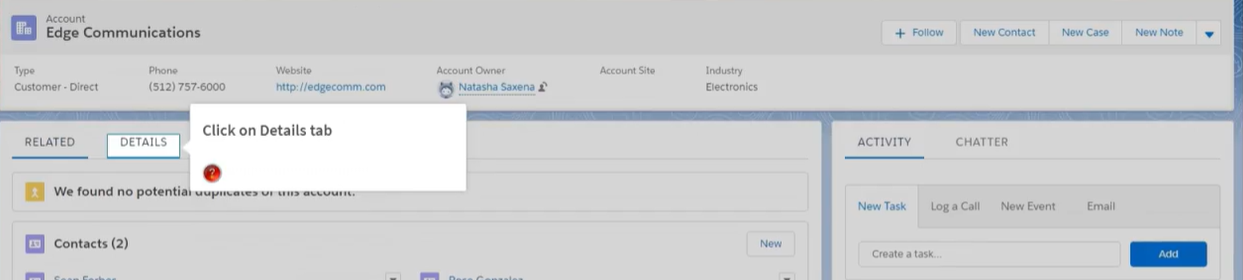
7. Click on the Details tab.
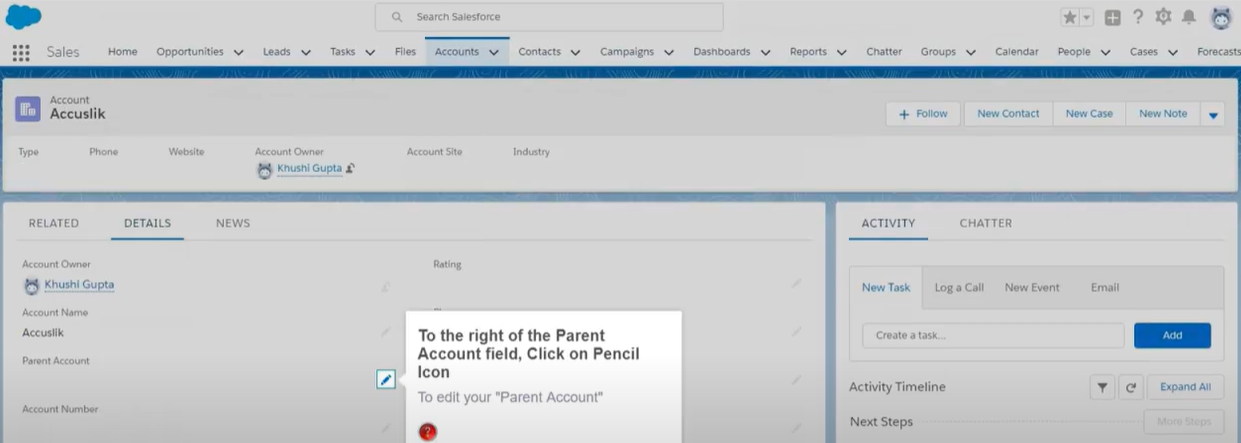
8. After clicking on the Details tab, find the field name “Parent Account.” Click on the Pencil icon to either edit or create your parent account.
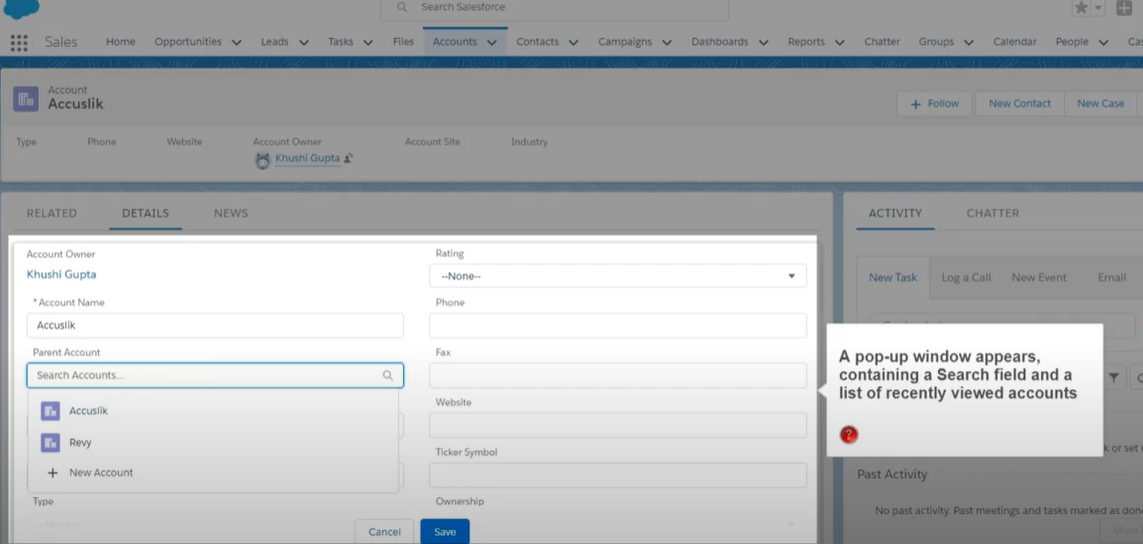
9. Upon hitting the pencil icon, a pop-up window will appear containing a Search field and a list of recently viewed accounts.
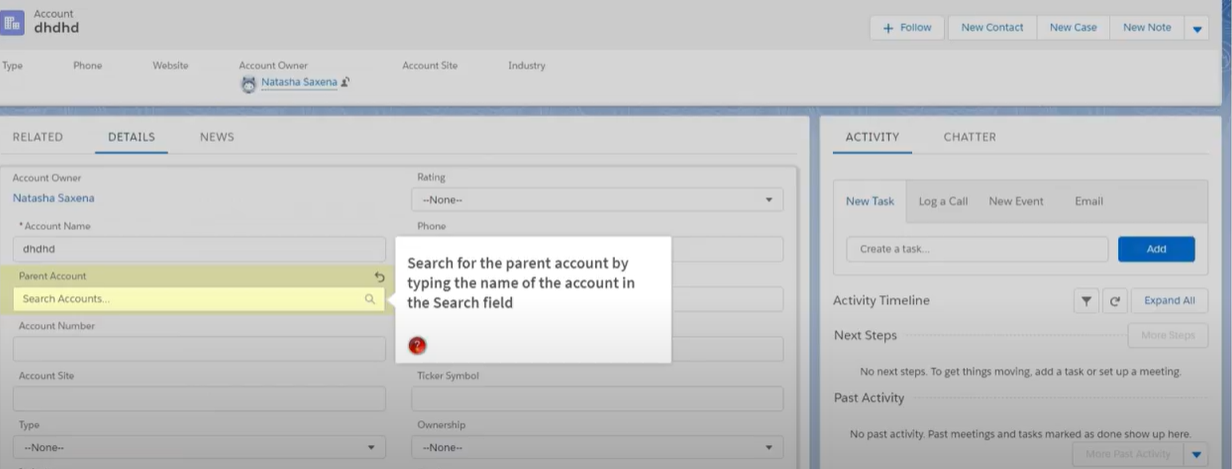
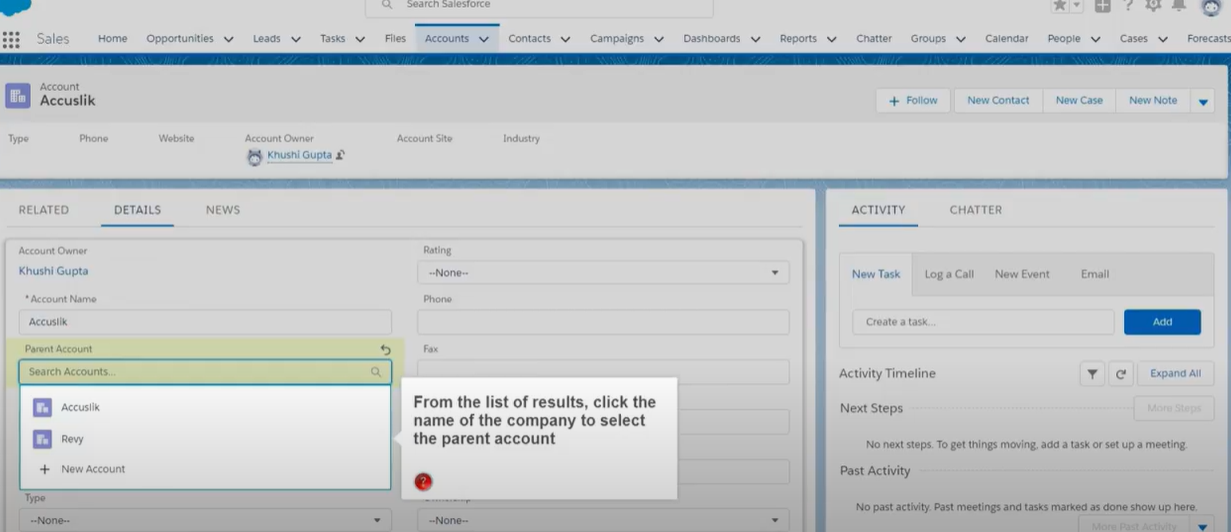
10. In the Search field, enter the account name you want to designate as a parent account.
11. From the results list, click on the company name to choose the parent account.
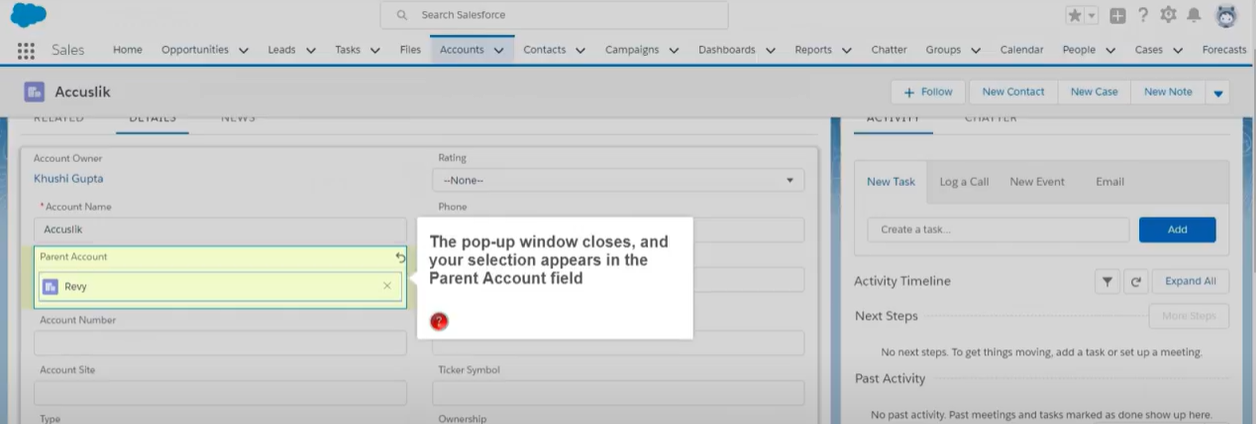
12. When the pop-up window closes, your choice will be displayed in the Parent Account field.
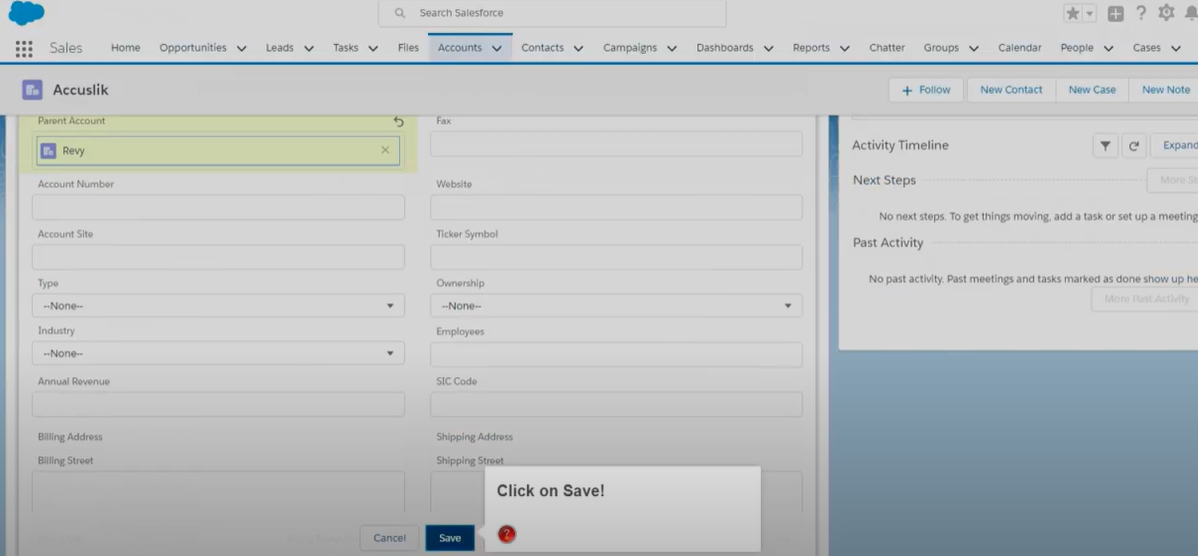
13. Click Save.
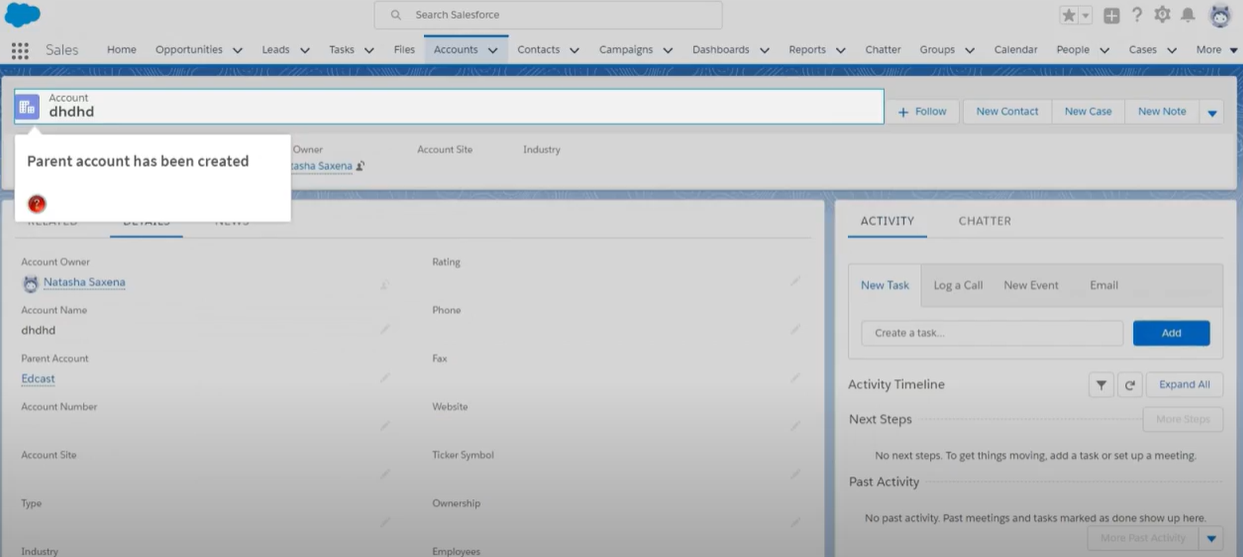
14. Your parent account is created.
Why is account hierarchy required in Salesforce?
Account hierarchy lets you create a self-parent-child relationship among account records. Once you do this, the related accounts will start appearing on a related list, just like any other child record defined on the parent account page.
Simply put, these relationships give you an overall view of the company and its af filiates by displaying all the accounts connected via the Parent Account field. These are commonly used for modeling departmental or divisional accounts, but can be used in all sorts of creative ways to give users better access to information and insights that can only be obtained by understanding account relationships.
Scenario #1
Firm A is the parent company with Departments A, B, and C associated with it. This works the same way with divisions, subsidiaries, or any other type of corporate segmentation where Company A is the parent company and Departments A, B, and C are tied to it. The same is true for divisions, subsidiaries, or any other type of business subdivisions.
Scenario #2
A nonprofit pays for child care for low-income families. In this case, you have Parent accounts and Child accounts – literally. But you also have child care providers, who need to be associated with the Parent account in order to fully understand the organization’s client base and activities. Through the use of Parent accounts, it becomes easy to run reports that show the activities and relationships among all the stakeholders.
The use of Parent accounts eliminates the need to create ad hoc reports showing relationships among accounts. With the relationships already defined, users can more easily mine Salesforce data for valuable insights.
Quick Tips
Parent-child relationships are closely coupled relationships, featuring various shared characteristics:
- A parent reference is required for a child record.
- Cascaded deletion: If you delete a parent, the children will also be deleted immediately.
- The parent determines all the sharing rules.
Salesforce uses a B2C structure for Person Accounts while a B2B one for Business Accounts. A company’s headquarters or main office can never be a person account. As a result, you are unable to select Person Account as Business Account’s parent Account.
There is no limit on how many child accounts can be under a parent account in Salesforce. However, a child can only have one parent account. We, therefore, always have a one-to-one relationship from child to parent.
Whenever a case is linked up with a primary case, it depicts a relationship between the cases. As a result, they can be grouped together either for simple tracking or divided into several cases for different people to handle. Here, the primary case, to which several other cases can be connected, is referred to as the parent case in Salesforce. In contrast, all the other related cases are known as child cases.
To view the parent account of any child account in Salesforce, look for the built-in “Parent Account” field on the account page layout.
The Parent Account field is used to display accounts that are associated with account hierarchies. For setting up the account hierarchy, just follow as instructed: 1) Enter an account in the Parent Account field for each account except for the one at the top level of the hierarchy. 2) Enter Account Settings from Setup in the Quick Find box, then click Account Settings.