i n o v i
 

Inovi Tree List View

Installation & Setup Guide


Your Hierarchical View of Anything


Table of Contents

1. Installation Guide Video

2. Setting Up Inovi Tree List View

3. Using Inovi Tree List View in a Record Page

4. Support

1. Installation Guide Video

2. Setting Up Inovi Tree List View

Inovi Tree List View can be used with Standard or Custom objects having self-lookup fields. In this example, Inovi Tree List View will be installed on the Account object.

1. In Setup, select Object Manager then Account.

Inovi Tree List View Screenshot

2. Next, create a custom field on the Account object. Select lookup relationship as the Data Type.

Inovi Tree List View Screenshot

3. As the Tree View App works on Objects having a self-lookup relationship, we will choose the Account object for the Related To option.

Inovi Tree List View Screenshot

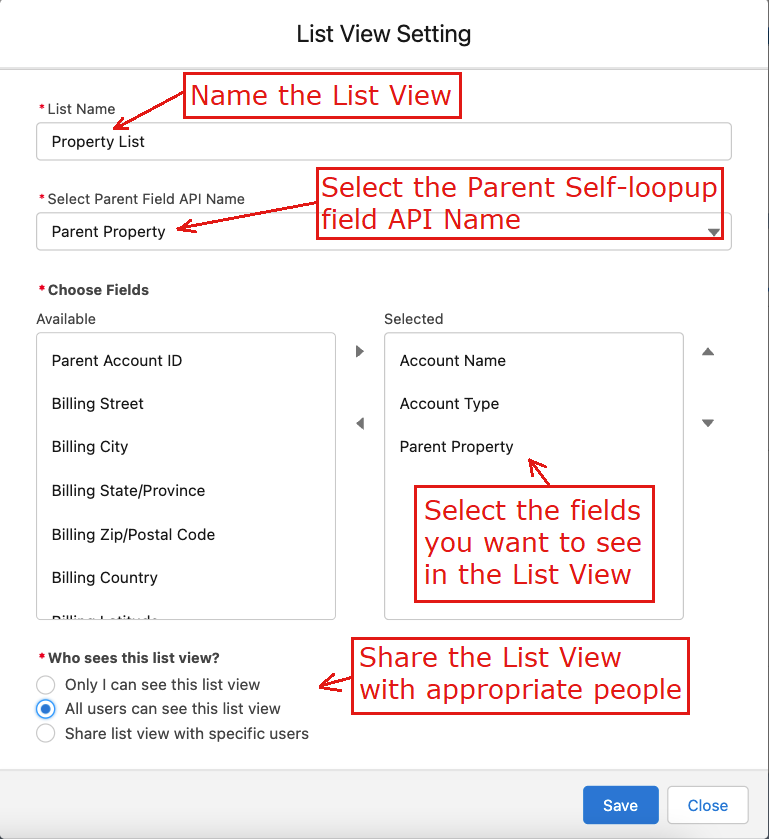
4. Name the Field Label (In this example, we used Parent Property)

Inovi Tree List View Screenshot

5. Parent Property will now be visible in the Field and Relationship View.

Inovi Tree List View Screenshot

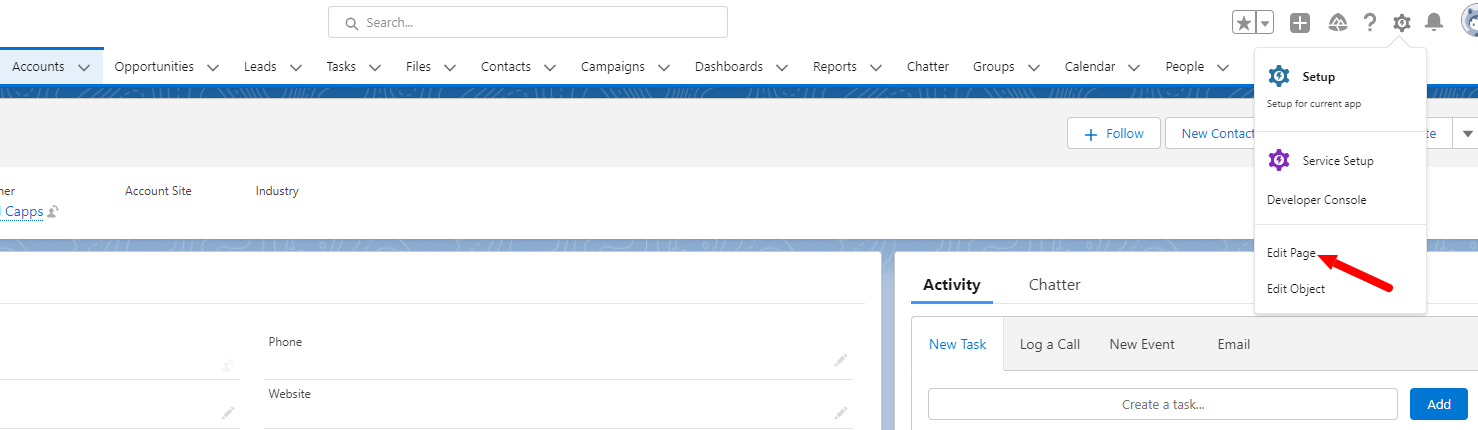
6. Click the Gear icon from an Accounts record page and select “Edit Page”.

Inovi Tree List View Screenshot

7. In the Lightning App Builder edit page view, create a custom tab. Name the custom tab. For this example, we are naming the tab “Tree List View”

Inovi Tree List View Screenshot

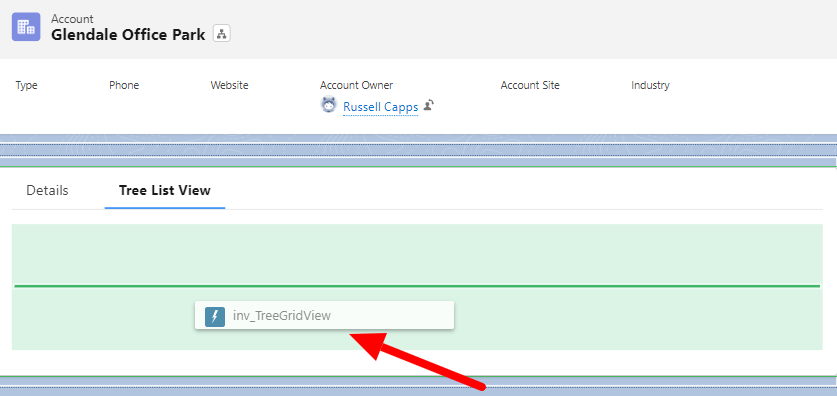
8. Click on the Tree List View component. Drag the Inovi Tree List View component to the Add Component(s) here, and drop it. **The Inovi Tree List View component can be added anywhere on the record page.**

Inovi Tree List View Screenshot

9. Activate the edited Account Record page. Select the form factors that you want your record page to be available for. Save your changes.

Inovi Tree List View Screenshot

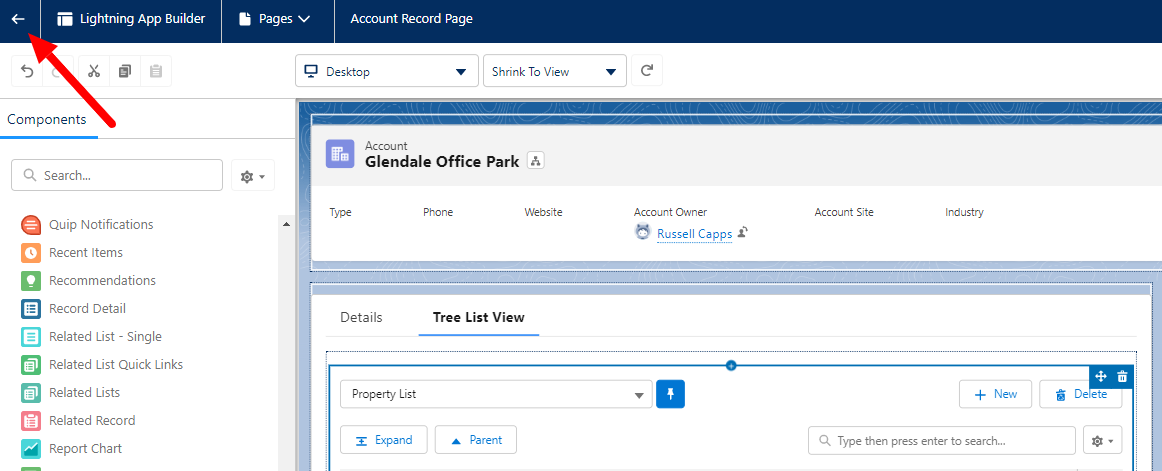
10. Once saved, click on the back arrow to return to the record page.

Inovi Tree List View Screenshot

11. Success! You have successfully installed Inovi Tree List View!

Inovi Tree List View Screenshot

3. Using Inovi Tree List View in a Record Page

1. Inovi Tree List View comes with Property and Owner List Views, but you can edit and create custom list views.

Inovi Tree List View Screenshot

2. Be sure to “Pin” your Property List View to display your list.

Inovi Tree List View Screenshot

3. Use the Parent Button to navigate up the account hierarchy and the Expand button to see each generation of children, grandchildren, etc.

Parent Button

Inovi Tree List View Screenshot

Expand/Collapse Button

Inovi Tree List View Screenshot

4. Search Option and Creating a new List View

Inovi Tree List View Screenshot

5. The dropdown list from the Gear icon allows you to create, edit and delete list views:

Inovi Tree List View Screenshot

4. Support

Email: [email protected]